
ECLIPSE RAPID WALL REPAIR PATCH
A unique and innovative drywall repair solution that is perfect for completing permanent repairs on damaged walls and ceilings.

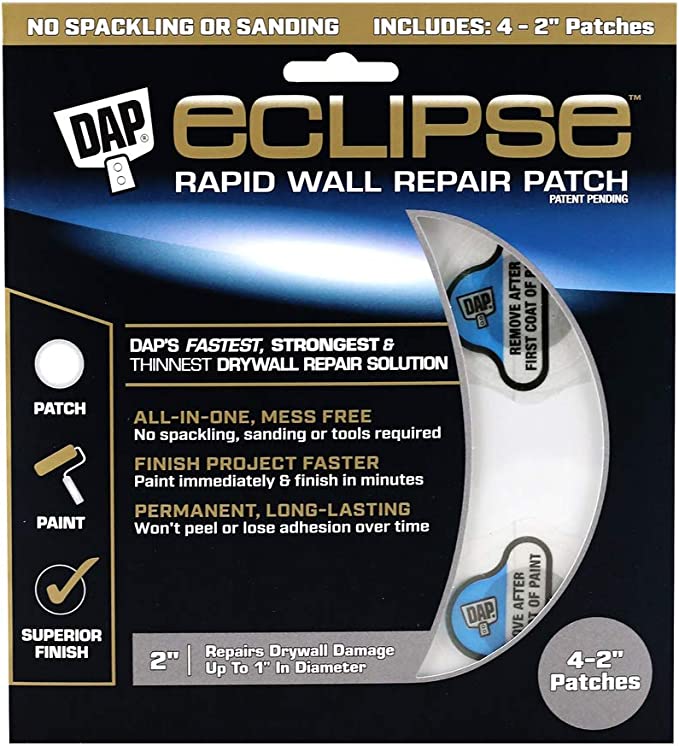
2″ RAPID REPAIR PATCH
DAP’s fastest, strongest & thinnest drywall repair solution. Repairs Drywall damage up to 1″ in diameter.
VIEW ON AMAZON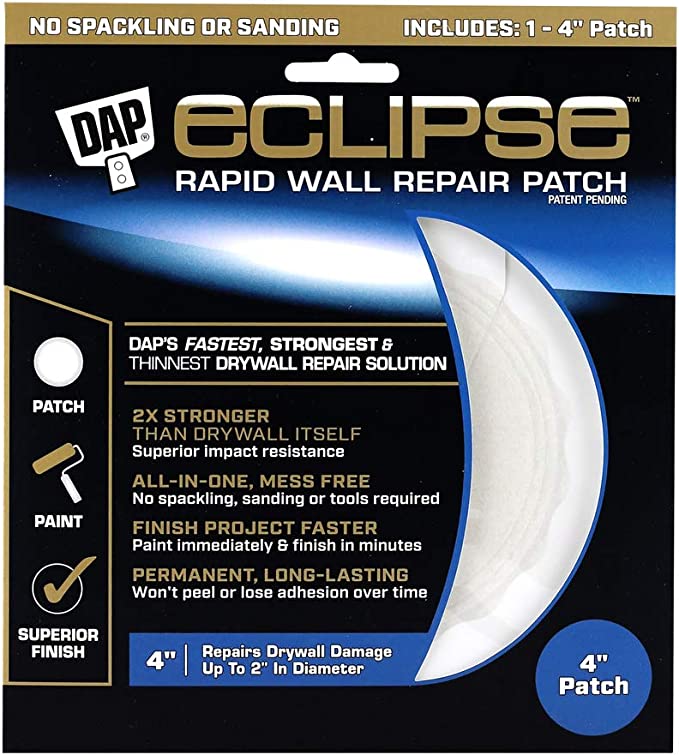
4″ RAPID REPAIR PATCH
DAP’s fastest, strongest & thinnest drywall repair solution. Repairs Drywall damage up to 2″ in diameter.
VIEW ON AMAZON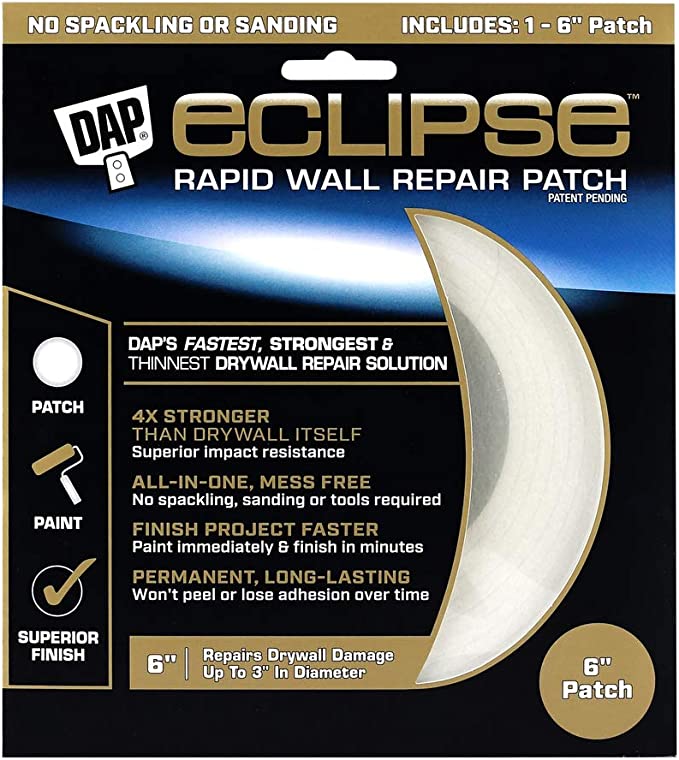
6″ RAPID REPAIR PATCH
DAP’s fastest, strongest & thinnest drywall repair solution. Repairs Drywall damage up to 3″ in diameter.
VIEW ON AMAZON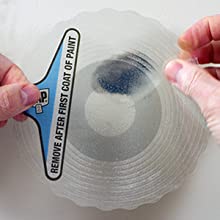
SMALL REPAIRS
deal for nail holes, nail pops, anchor and cable cord removal damage.
MEDIUM REPAIRS
Great for everyday wall damage caused by moving furniture, everyday accidents, or relocating things like towel racks.
LARGE REPAIRS
Eclipse patches can even be used for repairs up to 7.5cm in diameter.

CEILING APPLICATIONS
It’s as easy as patch, paint, and finish.
FAQs
- The patch can be cut and customized to different shapes and sizes to fit certain applications such as in corners, along trim and moulding, or for outlet applications. When cutting with scissors or a utility knife, make sure the tab is still fully intact so you can remove the protective layer.
- It’s recommended to de-gloss the damage and surrounding drywall using sandpaper to help achieve a smooth surface and increase adhesion. Ensure the surface is smooth, dry and free of any debris and jagged edges prior to applying the patch.
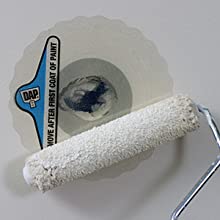
- Apply a generous amount of paint with each coat to ensure paint coverage. Always use a paint roller – using a paint brush is not recommended as it can leave brush strokes and won’t provide the best coverage. Patch may take longer to fully dry than surrounding drywall. Per paint manufacturer instructions it could take up to 4 weeks for paint to fully cure.
- Patch may be noticeable and visible until it has completely dried. As it dries, it will continue to improve its appearance with the surrounding drywall.
- If repairing layer by pulling the pop-up tab immediately after applying the patch to the drywall (no need to apply the first coat of paint). Apply texture, using aerosol spray or a textured paint roller. Allow to dry thoroughly, then apply two additional coats of paint to complete your project.
- Use the grey centre circle of the patch as a guide to align over the centre of the damage. Be sure the damaged area does not exceed the grey area.
- Press firmly to smooth around the outer edges of the patch to ensure proper adhesion to the surrounding drywall. Only press where the patch is in contact with the drywall. Do not push through the damaged area.
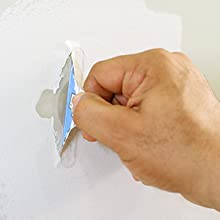
- Pull the pop-up tab up and away from the drywall towards yourself in order to release the protective layer from the patch. If the protective layer does not completely come off in one piece, use your fingernail to remove the rest of the protective layer prior to applying the next coat of paint.